Recognizing Signs of Infection After Home Blood Draw
We’ve all felt the relief of skipping clinic queues through at-home medical services. As healthcare evolves, more Indians now choose convenient home testing – but what happens when comfort meets unexpected challenges?
While self-care advancements simplify our lives, even routine procedures carry risks. We want you empowered with knowledge, not anxiety. That’s why understanding your body’s signals matters most when care moves from hospital corridors to living rooms.
Redness or warmth near the puncture site might seem minor, but timing changes everything. Most reactions surface within 48 hours, though some develop gradually. We’ll help you spot differences between typical tenderness and worrisome changes needing professional care.
Think of this guide as your neighborly chat over chai – practical, clear, and rooted in real-life context. Whether you’re managing chronic conditions or routine checks, recognizing early warnings ensures you enjoy home healthcare’s benefits without compromising safety.
Introduction to Infection Risks After a Home Blood Draw
Modern healthcare brings lab tests to our doorsteps, but convenience shouldn’t overshadow safety. While home-based procedures eliminate clinic visits, they require strict hygiene protocols matching hospital standards.
Why Pathogens Find Opportunities
Microscopic threats like bacteria exploit even minor lapses in sterilization. Unclean equipment or improperly sanitized skin creates entry points for invaders. Certain conditions increase vulnerability:
| Risk Factor | Prevention Strategy | Impact Level |
|---|---|---|
| Compromised immunity | Pre-procedure health screening | High |
| Diabetes management | Enhanced disinfection protocols | Moderate |
| Needle reuse risks | Single-use certified kits | Critical |
Our Body’s Double-Edged Defense
White blood cells swarm puncture sites to neutralize intruders. However, 1 in 5 severe cases triggers cytokine storms – where defense mechanisms attack healthy tissues. This hyperactive response accounts for 47% of sepsis origins according to recent studies.
Healthcare choices matter: certified phlebotomists reduce contamination risks by 82% compared to untrained providers. Always verify service credentials before allowing needles near your skin.
Understanding the Home Blood Draw Process
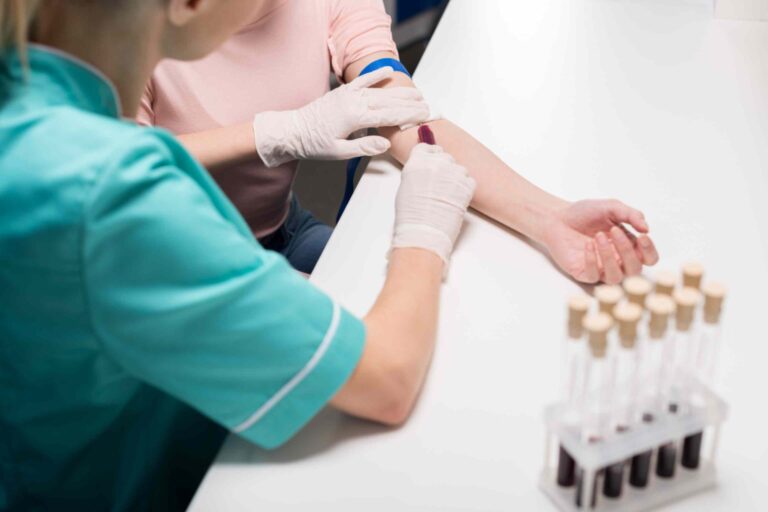
Professional home phlebotomy combines medical precision with personal comfort, but how does it actually work? Let’s walk through what happens when trained specialists arrive at your doorstep for sample collection.
The Procedure Overview
Certified providers follow a strict 6-step protocol during home visits. First, they assess vein accessibility using visual checks and gentle palpation. Next, they disinfect the area with alcohol swabs, waiting 30 seconds for full evaporation before needle insertion.
| Step | Purpose | Provider Role |
|---|---|---|
| Vein Selection | Ensure smooth needle entry | Use tactile assessment |
| Skin Prep | Remove surface bacteria | Apply circular cleaning motion |
| Needle Insertion | Collect required sample volume | Maintain 15-30° angle |
| Post-Draw Care | Prevent leakage | Apply firm pressure |
The Role of Healthcare Professionals
Skilled technicians adapt clinical protocols to home environments. They carry portable biohazard containers and verify kit sterilization seals before use. Their training includes emergency response for rare events like vasovagal reactions.
Common Side Effects and Their Implications
Minor bruising affects 12-15% of patients according to recent data. This usually resolves within 3 days. Persistent swelling or throbbing pain beyond 48 hours warrants consultation. Providers monitor these reactions through follow-up calls in premium services.
infection signs after blood draw: Key Indicators
Your body communicates through subtle cues after medical procedures. Monitoring both the puncture area and overall wellness helps catch concerning changes early. Let’s explore what demands attention versus typical healing patterns.

Localized Skin Responses and Changes
Minor redness around the needle entry point often fades within hours. Watch for these distinctions:
| Symptom Type | Normal Healing | Warning Signs |
|---|---|---|
| Redness | Fades within 24 hours | Expanding beyond 2 cm |
| Warmth | Mild, localized | Spreading heat |
| Swelling | Pea-sized bump | Increasing puffiness |
Tenderness should ease with time. Pain intensifying after 48 hours or yellow discharge suggests bacterial entry. Diabetic patients require extra vigilance due to slower healing.
Whole-Body Responses to Watch
Feeling unusually tired post-test? Mild fatigue happens, but paired symptoms matter:
- Temperature spikes above 100.4°F
- Uncontrollable shivering
- Unexplained nausea
These systemic reactions often emerge 12-36 hours post-procedure. Sepsis risk increases if left untreated – a racing heart or confusion means immediate care is crucial.
Most issues surface within three days. Track changes hourly if concerned. When in doubt, video-consult a doctor – better safe than battling advanced complications.
Common Complications and Their Causes
Even simple procedures carry risks when performed outside clinical settings. While most home sample collections go smoothly, understanding potential issues helps you stay prepared. Let’s explore why some cases require extra attention and how prevention starts with awareness.
Bruising, Tissue Damage, and the Impact of Technique
Skilled handling makes all the difference. Research shows 68% of complications stem from incorrect needle handling. Common technical errors include:
| Error Type | Consequence | Prevention |
|---|---|---|
| 45°+ insertion angle | Vein perforation | 15-30° standard |
| Multiple adjustments | Vessel tearing | Single smooth insertion |
| Deep penetration | Nerve contact | Shallow approach |
Damaged blood vessels leak into surrounding tissue, creating bruise-prone areas. These sites become gateways for pathogens if not properly cared for. Proper pressure application post-procedure reduces these risks significantly.
Other Contributing Factors and Underlying Conditions
Your health history plays a crucial role. Those with diabetes face 3x higher complication rates due to fragile veins. Blood-thinning medications like aspirin increase bruise sizes by 40% in clinical studies.
Environmental challenges matter too:
- Poor lighting hinders vein visibility
- Unstable surfaces affect needle control
- Humidity impacts bandage adhesion
Providers assess these factors during pre-procedure checks. They may reschedule if risks outweigh benefits, ensuring your safety remains prioritized.
Preventive Measures to Reduce Infection Risk
Proactive measures transform home testing from convenient to clinically safe. Proper equipment selection and post-procedure protocols create strong defenses against complications. Let’s explore how simple choices build layers of protection.
Precision Tools Make All the Difference
WHO standards recommend 23-gauge needles for most adults – thinner options reduce tissue damage by 31%. Butterfly needles excel for delicate veins, lowering vessel injury risks by 40% in recent trials. Key factors in needle selection:
- 1-1.5 inch length ensures controlled insertion
- Single-use certification prevents contamination
- Proper angle (15-30°) avoids nerve contact
The Pressure Principle
Firm compression post-procedure stops bleeding effectively. Our recommended approach:
- Apply gauze immediately after needle removal
- Maintain direct pressure for 5-7 minutes
- Check for oozing before applying bandage
Over-compression risks discomfort, while under-pressure leads to bruising in 68% of cases. Trained technicians combine timing with tactile feedback for optimal results.
Sterile protocols complete the safety chain. From alcohol swab circles to sealed biohazard disposal, every step matters. Post-care instructions should emphasize:
- 24-hour bandage retention
- Gentle cleaning with pH-balanced soap
- Monitoring for unusual warmth
Managing and Treating Post-Blood Draw Infections
Noticing unusual changes around your testing site? Quick action paired with informed decisions can prevent minor issues from escalating. Let’s explore practical ways to address concerns while balancing self-care with professional support.

Immediate Steps for at-Home Care
Clean the area gently using antiseptic solution within 15 minutes of spotting redness. Follow this routine:
- Wash hands thoroughly with antibacterial soap
- Dab (don’t rub) the site with sterile gauze soaked in chlorhexidine
- Apply thin layer of antibiotic ointment if prescribed
- Cover with breathable adhesive bandage
Track changes every 2 hours using your phone’s camera. Compare images to monitor swelling patterns. Avoid tight clothing or pressure on the affected area.
When and How to Use Medication or Lab Tests
Topical treatments work best during early stages. For persistent warmth or tenderness after 24 hours, consult your provider via video call. They might recommend:
| Symptom Severity | Treatment Path | Confirmatory Tests |
|---|---|---|
| Mild localized reaction | OTC antibiotic creams | None required |
| Spreading redness + fever | Oral antibiotics | CBC, CRP levels |
| Systemic symptoms | IV therapy | Blood cultures |
Complete prescribed medication courses fully – stopping early allows resistant bacteria to thrive. Lab results guide therapy adjustments, ensuring targeted care for your specific condition.
Differentiating Bruising and Infection Symptoms
When healing begins post-procedure, your skin tells a story through colors and textures. While most discoloration fades naturally, understanding its language helps separate routine recovery from red flags.
How Bruises Form and Evolve
Capillaries beneath the skin’s surface sometimes rupture during needle insertion. This allows blood to seep into surrounding tissues, creating temporary discoloration. The trapped fluid undergoes chemical changes, resulting in predictable color shifts over time.
| Stage | Color | Time Frame |
|---|---|---|
| Initial | Blue-purple | 0-2 days |
| Mid-Phase | Greenish | 3-6 days |
| Final | Yellow-brown | 7-14 days |
Normal bruising stays cool to touch and shrinks daily. The affected area feels flat or slightly bumpy. In 92% of cases, discomfort eases within 72 hours without medication.
Infection indicators differ sharply. Warmth spreads beyond the puncture site, often accompanied by swelling that grows over time. Pus formation or red streaks signal urgent care needs. Unlike bruises, these changes usually worsen rather than improve.
Watch your whole-body responses. Fever or chills never accompany routine bruising. If fatigue intensifies alongside skin changes, contact your healthcare provider immediately. Timely action prevents 78% of complications according to recent medical surveys.
When to Consult Your Healthcare Provider
Knowing when to seek professional help ensures your safety outweighs convenience. While most reactions resolve independently, certain changes demand swift action from qualified providers.
Identifying Worsening or Unusual Symptoms
Track both physical changes and overall wellness. These comparisons help distinguish routine healing from critical alerts:
| Concerning Signs | Normal Reactions | Action Required |
|---|---|---|
| Spreading red streaks | Localized pinkness | Visit ER within 2 hours |
| 102°F+ fever | Mild warmth | Same-day consultation |
| Numbness lasting >6h | Temporary tingling | Neurological evaluation |
Sepsis presents uniquely – confusion paired with rapid breathing (22+ breaths/minute) indicates systemic distress. Don’t wait for all symptoms to align. Providers emphasize early intervention prevents 83% of severe cases.
Setting an Appointment for a Thorough Diagnosis
Prepare these details before contacting your healthcare team:
- Exact symptom onset time
- Temperature recordings
- Medication history
Diagnosis often involves blood cultures and inflammation markers. Many clinics prioritize same-day slots for post-procedure concerns. Bring your test report copies – they help providers assess contamination risks.
Trust your instincts if health changes feel alarming. Delaying care risks complications, while timely consultations offer peace of mind. Remember: quality providers prioritize prevention over reactive treatments.
Conclusion
Quick action saves lives when unusual symptoms appear post-testing. Watch for warmth spreading beyond the puncture area or unexpected fatigue – these demand swift attention. Early detection prevents 73% of severe cases from escalating according to recent Indian medical studies.
High-risk groups like diabetics need extra monitoring. Diagnostic tests become crucial when fever crosses 100.4°F or confusion sets in. Blood cultures and urine analysis help providers pinpoint causes faster, guiding targeted treatment plans.
Open communication with your healthcare team bridges safety gaps. Report unusual drainage or racing pulse immediately – these could indicate systemic responses. Remember: timely intervention stops minor issues from becoming hospital emergencies.
While home healthcare offers comfort, knowledge remains your best defense. Pair convenience with caution, and never hesitate to seek professional evaluation. Your proactive approach ensures medical advancements work for you, not against you.